
Why Use Belimo Retrofit Actuators?
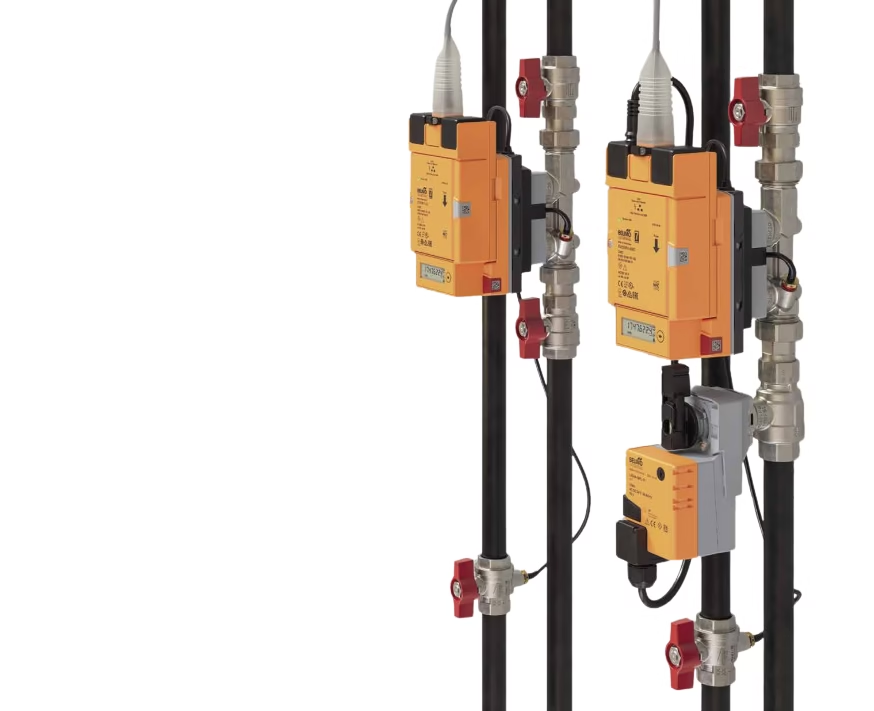
Replacing legacy or discontinued actuators in HVAC systems can be complicated due to mounting differences, torque mismatches, and signal variations. Belimo offers a retrofit solution that simplifies this process by providing universal mounting kits, adjustable shaft clamps, and wide voltage ranges, making it easy to upgrade existing systems with minimal downtime.
Step-by-Step Selection Process (as per Belimo guide)
-
Measure the Damper Size (sq.ft.)
-
Identify Blade Type (Parallel or Opposed)
-
Check for Blade Seals
-
Confirm the Rated Torque per Square Foot
-
Note Air Velocity or Static Pressure
-
Choose whether Spring Return is needed — see our spring return actuators guide for how that changes the torque requirement.
-
Confirm Voltage Requirements (24V AC/DC, 120V, 230V)
-
Identify Control Signal Type (On/Off, Modulating, Floating Point) — see our BMS control signals guide for what each type actually means.
-
Assess Shaft Dimensions and Coupling
-
List any Accessories or Linkages required
🧮 Example:
A 24″ x 24″ opposed-blade damper with seals and 5 in-lbs/sq.ft torque =
4 sq.ft × 5 = 20 in-lbs torque → Use LF24 or LF24-SR actuator.
Belimo Retrofit Cross Reference Examples
| Brand | Model No. | Belimo Retrofit | Notes |
|---|---|---|---|
| Honeywell | ML6161A2009 | LMB24-SR | 24V, modulating, spring return |
| Siemens | GCA126.1P | GMB24-MFT | 24V, programmable, non-spring |
| Johnson | M9106-GGA-2 | NM24A-SR | 24V, floating, spring return |
| Invensys | M7410A2001 | LF24-SR | 24V, 2–10 VDC, spring return |
Brackets & Mounting Kits
Belimo provides universal mounting brackets for each actuator series (e.g., KH6, KH7, ZG series) to simplify installation.
| Kit Code | Compatible Series | Application |
|---|---|---|
| KH6 | LF, NF | Parallel damper blades |
| KH8 | GM, AM, NM | Opposed blades |
| ZG-100 | All series | Shaft mounting accessories |
Common Actuator Series & Features
| Series | Torque Range | Control Type | Spring Return | Notes |
|---|---|---|---|---|
| LF | 35 in-lbs | On/Off, Mod | Yes | Compact, for small dampers |
| NM | 90 in-lbs | Mod/Floating | No | For mid-size dampers |
| GM | 180 in-lbs | Mod/Floating | Optional | For larger dampers |
Belimo Retrofit Documentation
🔗 Belimo RetroFIT+ product documentation
Final Tips
-
Always double-check voltage and control signals
-
Use the correct mounting bracket for easy fit
-
Don’t guess torque—calculate based on damper specs
Why Retrofit Instead of Full Replacement
A full actuator replacement usually means matching or exceeding original torque, control signal, and mounting geometry — and on an older system, the original spec sheet is often long gone. Retrofit kits solve a narrower, more practical problem: keep the existing damper and linkage in place, and swap only the actuator itself using a mounting adapter that bridges the geometry gap. That is almost always faster and cheaper than removing and re-fitting the whole damper assembly, which is why Belimo built a dedicated retrofit line rather than expecting facilities teams to cross-reference full replacements every time.
Walking Through the Selection Steps
The ten-step checklist above covers what to check; here is why each step actually matters:
- Damper size and blade type set the baseline torque requirement — a parallel-blade damper and an opposed-blade damper of the same size do not need the same torque, because they move air differently as they modulate.
- Blade seals add resistance the actuator has to overcome, particularly at the fully-closed position — a sealed damper can need meaningfully more torque than an unsealed one of the same size.
- Air velocity and static pressure matter because higher velocity across the blades increases the aerodynamic load the actuator is fighting, on top of the mechanical load of the damper itself.
- Spring return is a life-safety question as much as a technical one — if the application needs the damper to fail to a safe position on power loss (smoke dampers, outside air dampers in a fire sequence), spring return is not optional.
- Voltage and control signal have to match the existing wiring and the BMS point type exactly — a modulating actuator wired to an on/off point, or vice versa, will not fail loudly, it will just behave wrong.
- Shaft dimensions and coupling determine whether the retrofit bracket you pick will actually grip the existing shaft without slipping under load.
For the full derivation of these torque loading factors — including the actual formula and worked numeric examples — see our complete actuator torque sizing guide.
Common Retrofit Mistakes
- Sizing torque off the actuator being replaced, not the damper. If the original actuator was oversized, which is common since installers often round up, copying its torque rating forward oversizes the replacement too. Recalculate from the damper’s actual size and blade type.
- Assuming spring return status from the old actuator’s part number alone. Confirm the fail-safe requirement from the sequence of operations, not just by matching what was there before — a previous installer may have gotten it wrong too.
- Skipping the mounting bracket check. A retrofit actuator with the wrong bracket looks like it fits until the shaft coupling starts slipping under normal operating torque, which shows up as intermittent damper failure months later, not immediately.
- Verifying the control signal against the old wiring diagram instead of the current BMS point. BMS points get remapped during system upgrades; the physical wiring may no longer match what the drawing says.
Frequently Asked Questions
Can I always retrofit instead of replacing the whole damper?
In most cases, yes, provided the damper frame and blades themselves are structurally sound. Retrofit kits replace the actuator and its mounting, not the damper. If the damper frame is corroded or the blades are damaged, a retrofit will not fix that.
What happens if I install an actuator with too little torque?
The actuator will struggle to fully open or close the damper, especially against sealed edges or higher static pressure, and it will draw more current and run hotter than intended — shortening its service life even if it does not fail immediately.
Is it safe to reuse the existing mounting bracket from the old actuator?
Only if it is confirmed compatible with the new actuator’s shaft and body dimensions. Belimo’s retrofit kits are matched to specific actuator series for a reason — a bracket that is close enough to fit is not the same as one that is rated for the application.